Sign-In with Google (Set up Google authentication)
This video demonstrates how to use the Sign-In with Google (Set up Google authentication) template.
from abilities import url_for_uploaded_file
from abilities import upload_file_to_storage
import os
import requests
from flask import Flask, render_template, request, redirect, url_for, session, flash
from app_init import app

@app.route("/login", methods=['GET', 'POST'])
def login():
    if request.method == 'POST':
        if 'credential' in request.form:
            # Handle Google Sign-In
            credential = request.form['credential']
            # Simulate Google Sign-In success
            session['username'] = 'GoogleUser'
            return redirect(url_for('profile'))
        else:
            username = request.form['username']
            # Simulate login success
            session['username'] = username
            return redirect(url_for('profile'))
    return render_template('login.html', google_client_id=os.environ.get('GOOGLE_CLIENT_ID'))

@app.route("/auth/google", methods=['POST'])Frequently Asked Questions
How can implementing the "Sign in with Google" feature benefit my business?
Implementing the "Sign in with Google" feature in your application can significantly benefit your business in several ways:
- Improved User Experience: It simplifies the login process, reducing friction and potentially increasing user sign-ups and retention.
- Enhanced Security: Google's authentication system is robust, reducing the burden of managing secure password systems.
- Increased Trust: Users often feel more comfortable using a familiar and trusted authentication method like Google.
- Access to User Data: With user permission, you can access valuable profile information, potentially improving personalization and user targeting.
What types of applications would benefit most from this "Sign in with Google" template?
The "Sign in with Google" template is versatile and can benefit various types of applications, including:
- Social media platforms
- E-commerce websites
- Educational platforms
- Productivity tools
- Content management systems
- Any application where quick, secure user authentication is valuable
It's particularly useful for applications targeting a broad user base familiar with Google services.
How can I customize the Google Sign-In button to match my application's branding?
The "Sign in with Google" template allows for customization of the Google Sign-In button. You can modify the button's appearance in the google_auth.js file. Here's an example of how you can customize the button:
javascript
   window.google.accounts.id.renderButton(
     document.getElementById("g_id_onload_login"),
     {
       theme: "filled_blue",  // Change button theme
       size: "large",         // Adjust button size
       shape: "pill",         // Modify button shape
       text: "continue_with"  // Change button text
     }
   );
You can adjust these parameters to better align with your application's design and branding guidelines.
What are the key security considerations when implementing "Sign in with Google"?
When implementing the "Sign in with Google" feature, consider these security aspects:
How can I track and analyze user engagement after implementing the "Sign in with Google" feature?
After implementing the "Sign in with Google" feature, you can track and analyze user engagement through various methods:
- Implement analytics tools like Google Analytics to track sign-in rates and user behavior.
- Use A/B testing to compare engagement between Google Sign-In and traditional login methods.
- Monitor user retention rates and session durations for users who sign in with Google.
- Analyze the completion rates of user profiles, as Google Sign-In often provides more initial user data.
- Track any changes in conversion rates for key actions in your application.
By analyzing these metrics, you can gauge the impact of the "Sign in with Google" feature on your application's user engagement and overall performance.
Created: | Last Updated:
Getting Started
To begin using this template, click on "Start with this Template" in the Lazy builder interface. This will pre-populate the code in the Lazy Builder, so you won't need to copy or paste any code manually.
Initial Setup
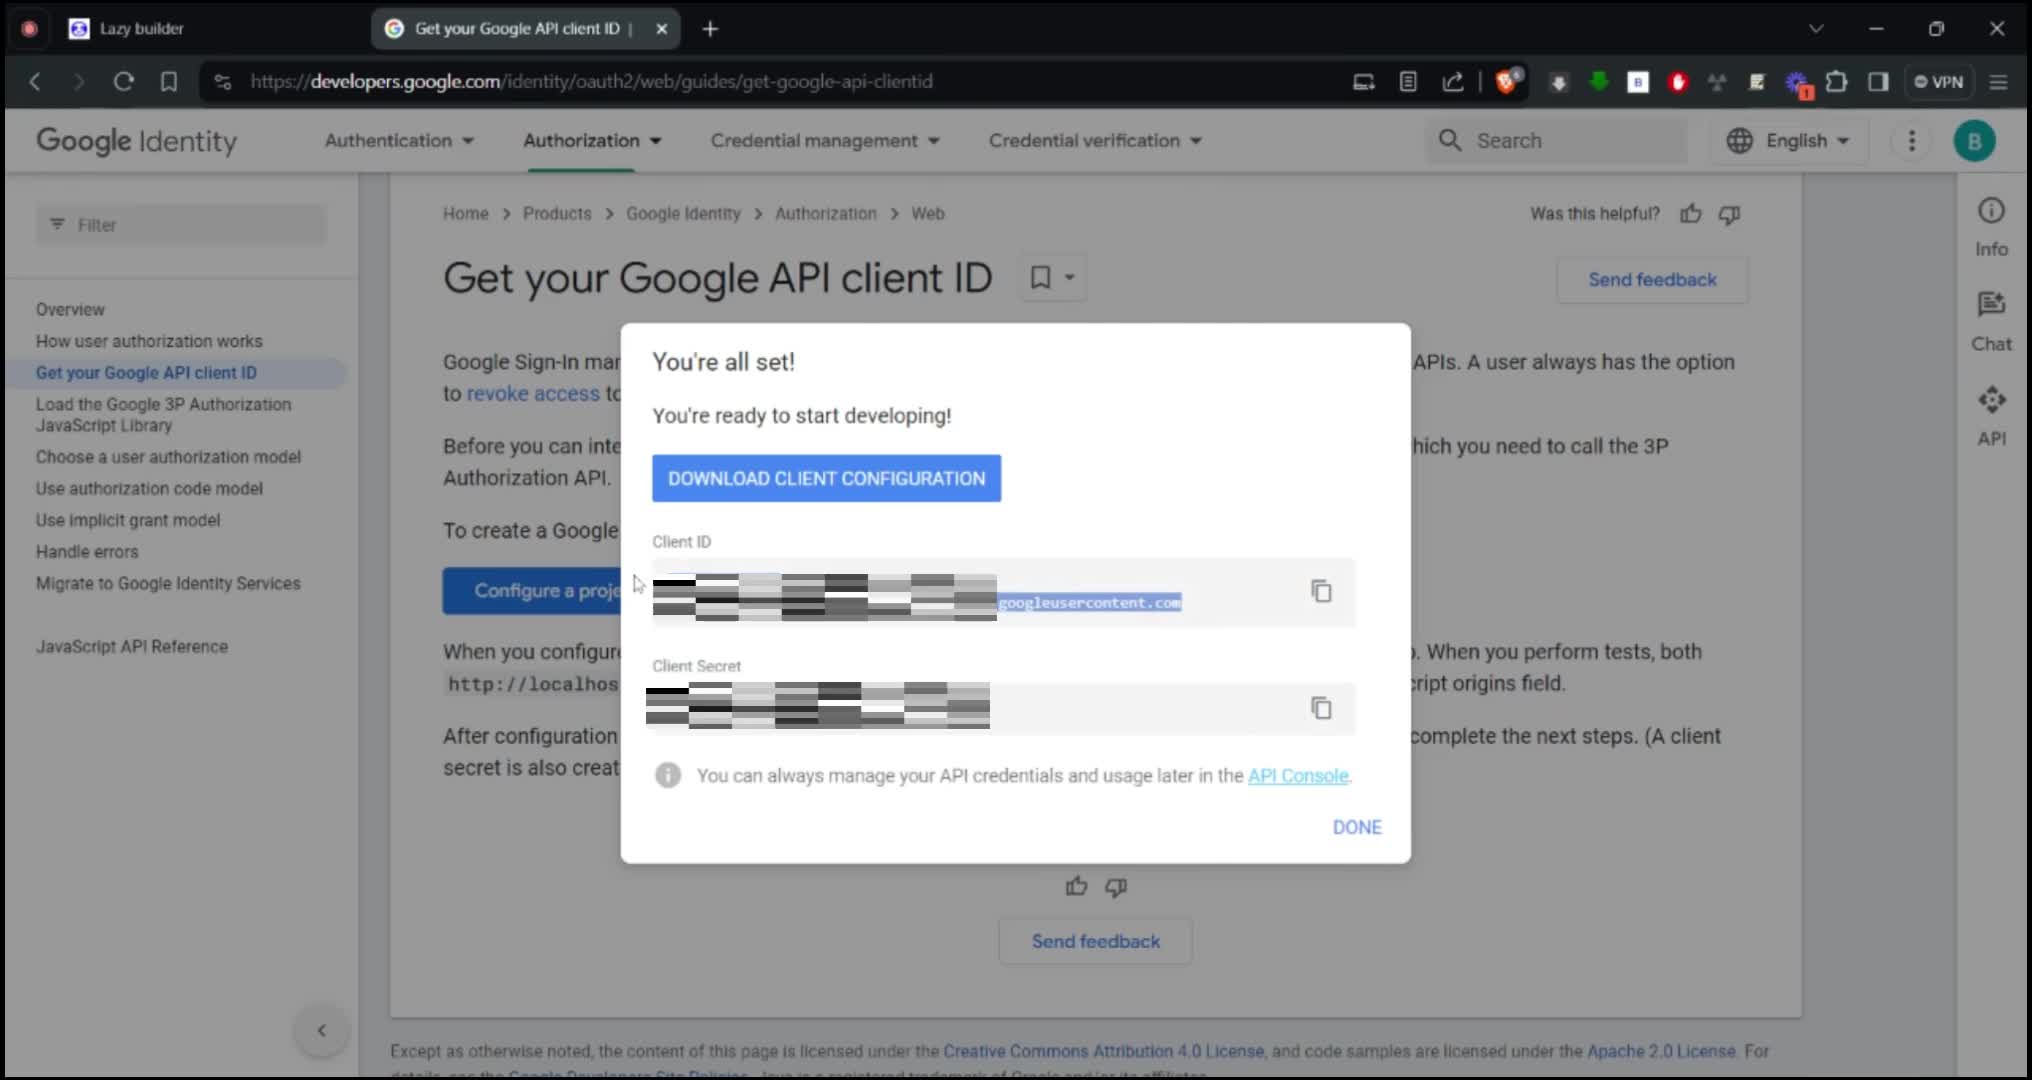
Before testing the template, you'll need to set up an environment secret for the Google client ID:
- Go to the Google Developers Console (https://console.developers.google.com/).
- Create a new project or select an existing one.
- Go to "Credentials" and create a new OAuth 2.0 client ID.
- Set the authorized JavaScript origins and redirect URIs to match the domain where your app will be hosted.
- Copy the client ID provided by Google.
- In the Lazy builder interface, navigate to the Environment Secrets tab.
- Create a new secret with the key `GOOGLE_CLIENT_ID` and paste the client ID you copied as the value.
Test: Pressing the Test Button
Once the environment secret is set up, you can press the "Test" button in the Lazy builder. This will deploy your app and launch the Lazy CLI. You will not be prompted for any user input at this stage since the template does not require it.
Using the App
After deployment, Lazy will provide you with a dedicated server link to access your app. You can use this link to interact with the frontend of your user authentication system:
- Visit the home page to see the welcome message and features list.
- Go to the login page to sign in with a username and password or use the Google Sign-In option.
- Once logged in, you will be redirected to the profile page where you can view and edit your profile details.
Integrating the App
If you wish to integrate this user authentication system into another service or frontend, you may need to:
- Update the redirect URIs in your Google project to include the domain of the service where you're integrating the authentication system.
- Ensure that the backend endpoints for login, logout, and profile management are correctly referenced in the frontend of the service you're integrating with.
- Use the provided server link in any external tool that requires user authentication.
Remember to secure your application by keeping your environment secrets confidential and following best practices for OAuth 2.0 authentication.
Here are 5 key business benefits for this user authentication template with Google Sign-In:
Template Benefits
-
Enhanced User Experience: By offering Google Sign-In, the template provides a quick and convenient login option, reducing friction in the user onboarding process and potentially increasing sign-up rates.
-
Improved Security: Leveraging Google's robust authentication system helps protect user accounts from common security threats, reducing the burden on businesses to manage complex password systems.
-
Simplified User Management: The template automatically retrieves user information from Google profiles, streamlining the account creation process and reducing manual data entry errors.
-
Increased Trust and Credibility: Integrating with a well-known and trusted platform like Google can enhance the perceived reliability of your application, potentially leading to higher user adoption rates.
-
Customizable User Profiles: The template includes features for users to upload profile pictures and manage account settings, allowing businesses to create more personalized and engaging user experiences.
Technologies
 Optimize Google Sheets with Lazy AI: Automate Data Analysis, Reporting and More